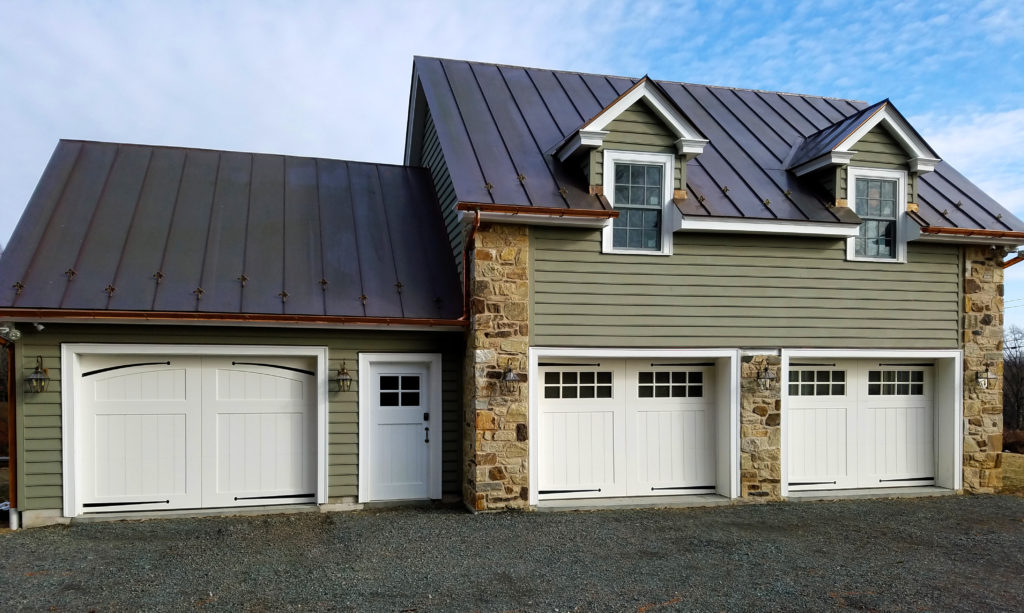
Your garage door isn’t just a defensive barrier against bad weather, debris, and unwanted animals. It also can significantly impact your utility bills during the winter and summer seasons.
One way to protect your garage door is to install weather stripping. Typically made from rubber or vinyl, garage door weather stripping lines the top, bottom, and side edges of your garage door or door frame to protect the overall door stability from the elements and help keep your garage secure.
Garage door weather stripping improves home efficiency and protection by:
- Regulating temperature: Keeping consistent indoor temperatures lowers utility costs.
- Preventing water damage: Shielding the garage from flooding and ice damage.
- Protecting your door and garage floor: Reducing wear and tear.
- Blocking pests: Preventing infestations and damage.
Let’s review everything you need to know about garage door weather stripping to help you choose the right option for your home.
6 Types of Garage Door Weather Stripping
There are six main types of garage door weather stripping, which we’ll examine in more detail in the following sections.
1. Garage Door Bottom Seals (Door Sweeps)
These long strips of rubber or vinyl attach to the bottom edge of your garage door via a steel, PVC, or aluminum retainer. When the door is closed, they compress against the floor to create a tight seal that helps keep water, dirt, debris, hot/cold air, and pests out.
It’s important to note that garage door bottom seals are typically nailed directly to the lower edge of wooden doors, rather than installed within a retainer. Along with garage door bottom weather stripping, side and top seals are attached to the remaining jamb around the garage entrance.
There are several types of garage door bottom seals including:
P-Shaped Seal
The P-shape seal, which is closed at the top, attaches to the garage door frame to create an airtight seal when closed. The “P” at the top of the seal helps achieve a tighter seal and provides further insulation. This option is ideal for doors constantly exposed to wind and precipitation.
T-Shaped Seal
T-shaped weather stripping, known for its distinct “T” shape, offers a flexible and effective seal for the bottom of garage doors. When the door closes, the seal is flexible enough to fill in the floor, effectively blocking gaps and preventing pests, moisture, and debris from getting into your garage.
Bulb Seals
Bulb seals effectively block airflow and prevent debris from entering your garage by using small circular protrusions at the top of the seal. This design allows them to adapt to uneven floors.
J-Shaped Seal
A popular type of seal is a J-shaped seal, which is specifically engineered to create a tight seal along the underside of garage doors. When the garage door closes, the flexible flap of the seal curls into a “J” shape under the door’s pressure, extending slightly beyond the door’s width.
2. Garage Door Threshold Seals
Garage door threshold seals attach to your garage floor (rather than the door itself) and can be used alone or in conjunction with a bottom seal. Usually made from rubber, vinyl, or aluminum, threshold seals are installed directly behind the garage door with a strong adhesive or concrete fixing screws.
If your driveway slopes down towards the door opening, threshold seals are a great way to help keep water out of your garage. They’re also particularly effective for filling large gaps underneath your door or leveling out an uneven garage entrance. If you frequently hose out or sweep your garage, keep in mind that door threshold seals can be mildly inconvenient, although not an impediment.
3. Garage Door Top and Side Seal Weather Stripping
These rubber or vinyl door insulation strips are attached to the wooden door stop molding located on the garage door jamb. The flap on the door stop molding presses against the closed garage door to create a tight seal around the top and sides, helping to keep the elements out.
4. Garage Door Brush Seals
Brush seals are made up of a strip of bristles that form a flexible barrier to protect against dust, debris, and insects. These seals are designed to fill irregular gaps, offering a reliable solution for various door and opening configurations.
5. Garage Door Stops with Integrated Weather Stripping
Typically made from vinyl, these products combine a wood-look molding strip with a flexible, weathertight flange. They’re a great option for older doors with stops that need to be completely replaced and updated with more durable insulation.
6. Garage Door Panel Weather Stripping
As the name suggests, these products are designed to seal the gaps between individual panels when your garage door is closed. They’re made from flexible rubber and are V-shaped to create a tight, even seal. While newer doors have interlocking edges to prevent air loss, many older wooden doors have flat-edged panels that benefit greatly from the addition of panel weather stripping.
Why Garage Door Weather Stripping Maintenance Matters
Garage door weather stripping will become dry and brittle over time (leading to cracking) or may fall out entirely due to wear and tear. While checking your weather stripping might seem unnecessary, regular maintenance can help you avoid potential problems.
You should check your weather stripping at least twice a year, preferably at the start of summer and winter due to the extreme temperatures each season can bring. To start, close the door and examine the top, bottom, and side weather stripping for the following:
- Breeze from outside air coming in
- Light coming through from outside
- Missing sections
- Cracking, flaking, or brittle sections
- Puddles of water near the outside of the door
- Rusted or brittle metal on/around the door
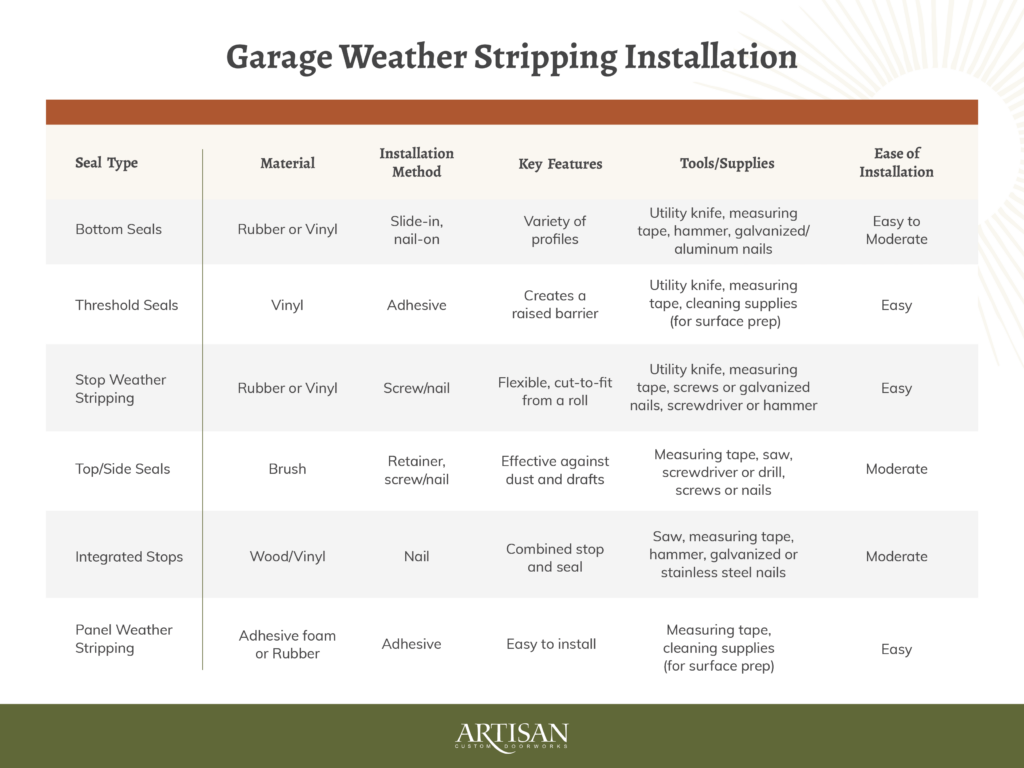
How to Install Garage Door Seals & Weather Stripping
Garage door seal replacement is an integral part of maintaining your door and ensuring the longest lifespan possible. To ensure a tight, consistent seal, be sure to replace the entire section of weather stripping at the same time, even if only a small portion is affected, and make sure your measurements are correct to avoid waste.
Quality weather stripping should last, on average, two to three years or longer before it needs to be replaced. But if you notice your weather stripping has any issues sooner than that, then it’s time for a replacement.
Let’s take a closer look at how to replace and install garage door seals for specific types of weather stripping.
In a hurry? We created a summary chart to give you all the important details.
1. Garage Door Bottom Seals (Door Sweeps)
You can choose from a variety of garage door bottom seal types and door bottom weather stripping to suit your specific needs. Doors with metal frames usually have an aluminum channel on the bottom edge that contains a U-shaped rubber gasket (also known as a T-style or astragal seal). These gaskets are very easy to install and simply slide into place using two small channel tracks.
Wooden garage doors often use a strip-style product with angled edges that seal shut between the bottom edge of the door and the garage floor. These garage door bottom seals are typically installed with galvanized or aluminum roofing nails. With true-swing garage doors, the astragal seal is attached to the active section to cover and seal the seam between panels when the door is closed.
2. Garage Door Threshold Seals
Vinyl garage door threshold seals typically come with a strong, high-quality adhesive that you can use to easily attach them to your floor.
3. Garage Door Stop Weather Stripping
This kind of weather stripping comes in rolls and can quickly be cut to length with a utility knife and installed using screws or galvanized nails. Once attached, make sure the weather stripping flange is pressing tightly against the door to ensure the best seal.
4. Garage Door Top and Side Seal Weather Stripping
Once your seals are measured and cut to the correct size, attach a retainer to the garage door frame using screws or other fasteners, like nails or adhesives. Then, slide the brush seal into place.
5. Garage Door Stops with Integrated Weather Stripping
Door stops with integrated weather stripping can easily be cut to length with a saw and installed using galvanized or stainless steel nails. Start by attaching the top piece, then overlap the ends of that section with each of the side stops. To install, simply push the molding towards the door so the weather strip flange is slightly compressed, then fasten it to the door.
6. Garage Door Panel Weather Stripping
This product is sold in rolls and is self-adhesive, making it one of the easiest DIY garage door weather stripping options available. To install, all you have to do is attach door insulation strips to the top or bottom edge of each panel.